A.L.S COMMUNICATION DEVICE USING ARDUINO MICRO PRO
(Updated 03/27/2021)
INTRODUCTION
The father of a friend has ALS (Amyotrophic lateral sclerosis) and recently things got more complicated, with great loss of his movements. I wanted to help, so I did some research in ways to enable him to keep communicating with his family. I have some electronics knowledge, so I thought I could use some common components I have laying around, and the result is this small project. Feel free to use and ask for information about how to do it.
COMMUNICATION SOFTWARE
The communication software I have chosen is the same used by Stephen Hawking, gently developed and open-sourced by Intel.
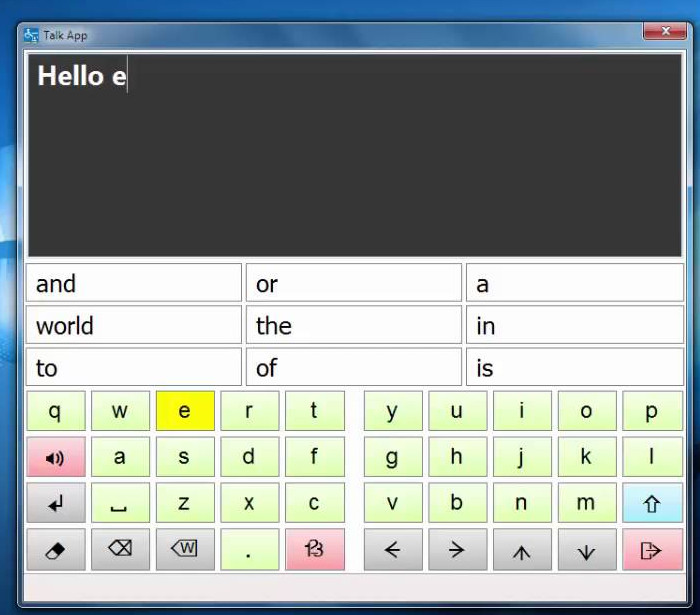
The software name is ACAT and can be downloaded here:
https://github.com/intel/acat/releases
There are support for other languages than english, like brazilian portuguese, my native language. The software is actually simple, there are two types of interaction with it: with a webcam, that detects the smallest cheek movements, or with a trigger, represented by the F12 keyboard key. I tested the webcam detection, and it works ok, but I wanted something to use while he still has some few movements, like at the feet, jaw or any other body area. What I noticed from my research is that each person has his specific needs, so be prepared to adapt it for each environment. The software is simple and usable. Most common words and phrases become more accessible, and make things easier. The only real setting you have to worry about is the timing of the character/word selection, so it does not goes too fast.
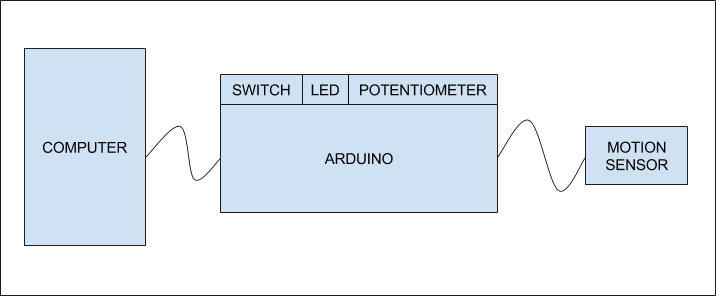
ELECTRONICS
When researching and testing approaches, I have tested several different kinds of sensors, like touch sensors, tilt sensors, etc, and most of them were not sensitive enough. I finally tested the idea with an accelerometer and it worked very well.
SENSOR
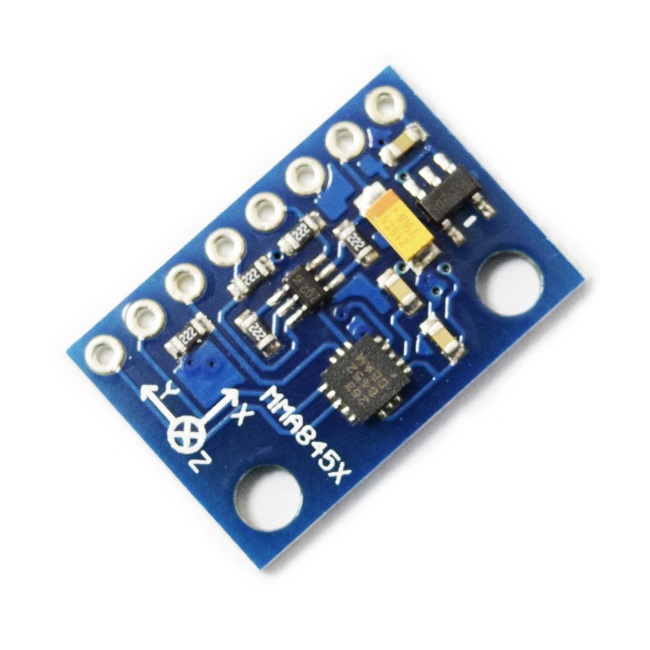
I tested three types of accelerometers, the MMA8452, the MPU6050 and the ADXL377. I chosed the MMA8452 because it is really easy to program, it is cheap, and for this project there is no need for a really advanced accelerometer.
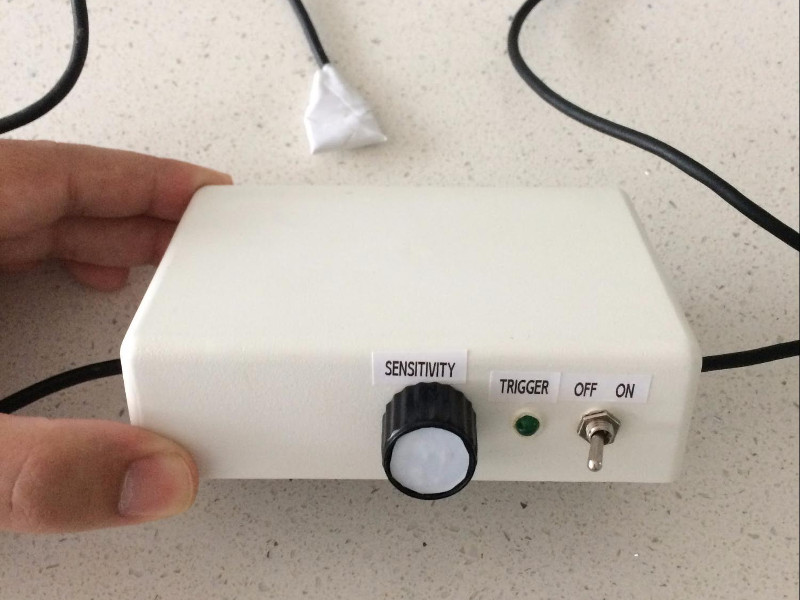
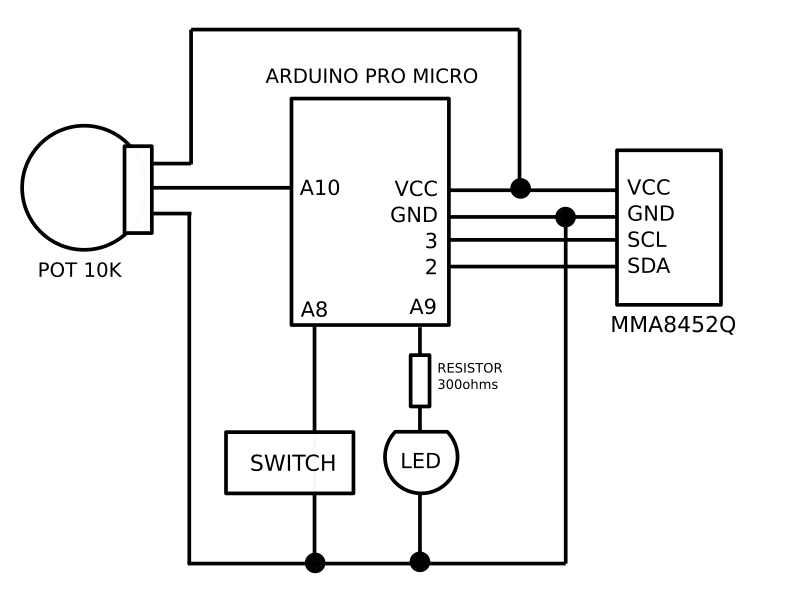
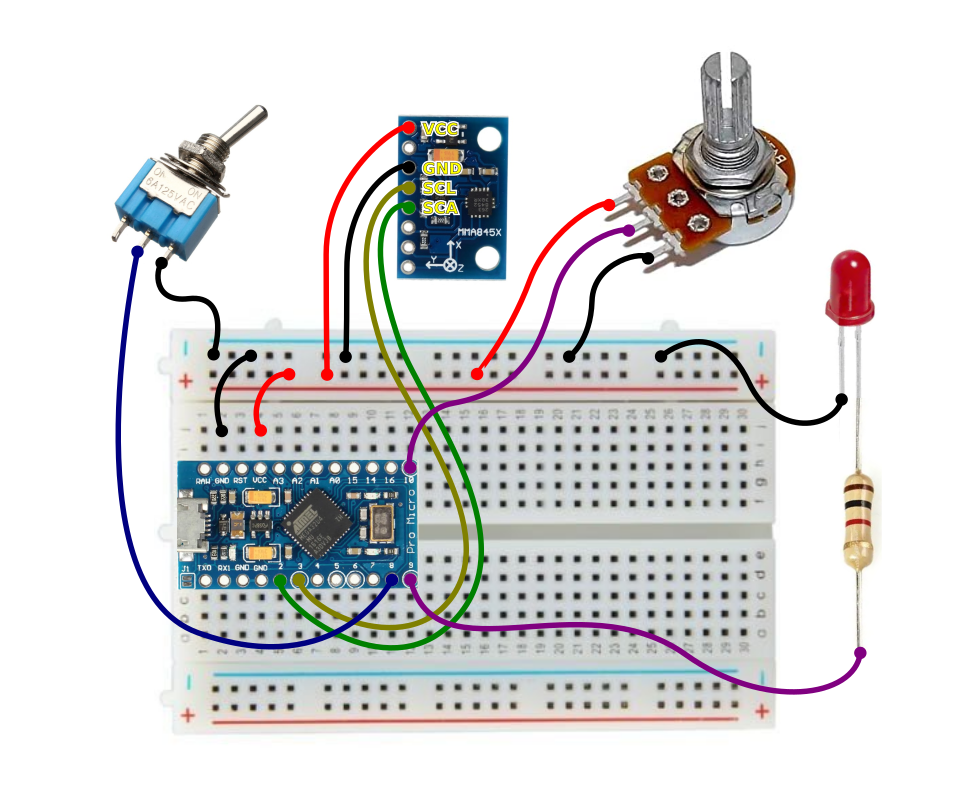
PARTS
- Arduino Micro Pro
- Accelerometer MMA8452
- Potentiometer 10k
- Green Led
- 1k resistor
- Switch
- Usb cable
- Plastic box PB-112/2 – 36 x 85 x 124 mm
SCHEMATICS
ARDUINO PROGRAMMING
The arduino program I developed is quite simple. It just tries to detect if there was too much motion, using a median of the accelerometer values, and a threshold defined by a potentiometer. When it detects the movement, it sends a F12 key press and waits for 500 millis for debounce.
#include "elapsedMillis.h"
#include "RunningMedian.h"
#include "Wire.h"
#include "SFE_MMA8452Q.h"
#include "Keyboard.h"

int potPin = A10;
int ledPin = A9;
int enabledPin = A8;
int tolerance = 0;
int val = 0;
bool blocked = false;
bool pressed = false;
MMA8452Q acelerometro(0x1C);
RunningMedian samplesx = RunningMedian(15);
RunningMedian samplesy = RunningMedian(15);
RunningMedian samplesz = RunningMedian(15);
elapsedMillis timeElapsed;

void setup()
{
    pinMode(ledPin, OUTPUT);
    pinMode(enabledPin, INPUT_PULLUP);
    digitalWrite(ledPin, LOW);
    acelerometro.init();
    Keyboard.begin();
}

void loop()
{
    bool enabled = digitalRead(enabledPin);
    if (enabled) {
        val = analogRead(potPin); // read the value from the sensor
        tolerance = val;
        if (acelerometro.available()) {
            acelerometro.read();
            samplesx.add(acelerometro.x);
            samplesy.add(acelerometro.y);
            samplesz.add(acelerometro.z);
            if (!blocked) {
                bool tmpx = (acelerometro.x > (samplesx.getAverage() + tolerance)) || (acelerometro.x < (samplesx.getAverage() - tolerance));
                bool tmpy = (acelerometro.y > (samplesy.getAverage() + tolerance)) || (acelerometro.y < (samplesy.getAverage() - tolerance));
                bool tmpz = (acelerometro.z > (samplesz.getAverage() + tolerance)) || (acelerometro.z < (samplesz.getAverage() - tolerance));
                if (tmpx || tmpy || tmpz) {
                    Keyboard.press(0xCD); //F12

                    digitalWrite(ledPin, HIGH);
                    blocked = true;
                    pressed = true;
                    timeElapsed = 0;
                }
            }
        }
    }
    if (pressed && (timeElapsed > 100) ) {
        Keyboard.release(0xCD); //F12
        pressed = false;
    }
    if (blocked && (timeElapsed > 500) ) {
        digitalWrite(ledPin, LOW);
        blocked = false;
    }
}
ARDUINO LIBS
There were three libs used in this project. Two can be directly installed through the IDE, and one has to be manually installed using the zip file:
- RunningMedian -> https://playground.arduino.cc/Main/RunningMedian
- ElapsedMillis -> https://playground.arduino.cc/Code/ElapsedMillis
- SFE_8452Q -> https://cdn.sparkfun.com/assets/learn_tutorials/2/4/9/SFE_MMA8452Q-library.zip
ACAT SOFTWARE INTEGRATION
Programming the Arduino using the Arduino IDE is a relatively simple process and there are several tutorials available on the internet.
The ACAT software, after being installed, is configured to use a video camera. In our project we will not use it, so you can click on the item AcatConfig-> Actuator and leave only the detection of F12 enabled. If you want to test, you can open a browser window and see that when you tap the accelerometer the developer console of the browser opens and closes, as it also uses the F12 key.
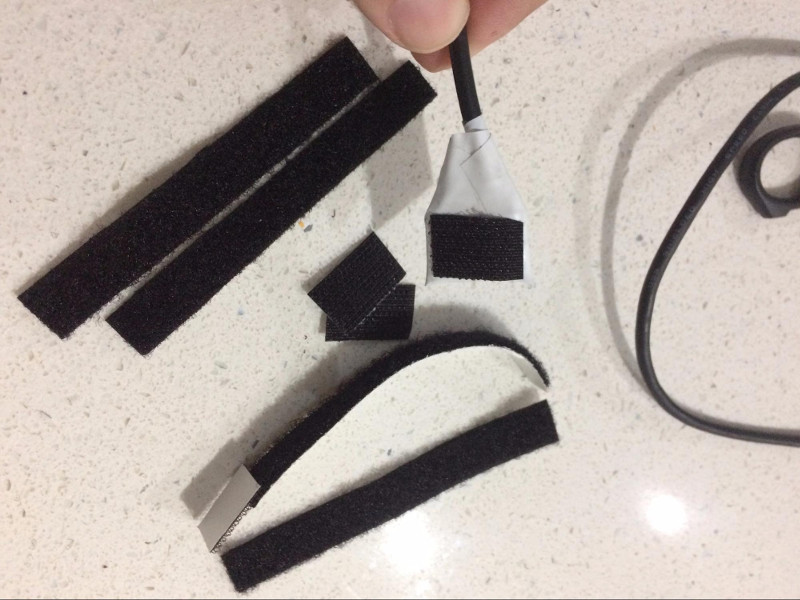
Adjusting the system is simple. after leaving the accelerometer connected to the finger or another part of the body, with it at rest, move the potentiometer until the led lights up. This is the maximum sensitivity. At this point, just turn the potentiometer back a little so that the led goes out and at that moment any movement will trigger and fire the F12 key.
CONCLUSION
The final result is a system that is affordable, has a very good sensitivity and I hope it can help a lot of people, with ALS or any other disabilities.
If you liked this project, think a little more about you spare time, and remember that no matter what is your religion, or your beliefs, you frequently can see that good karma always came back in different ways.
If you need help just contact me.
Ricardo Andere de Mello quilombodigital@gmail.com